
Build a RESTful Web Service with Spring Boot, Gradle, and OpenAPI
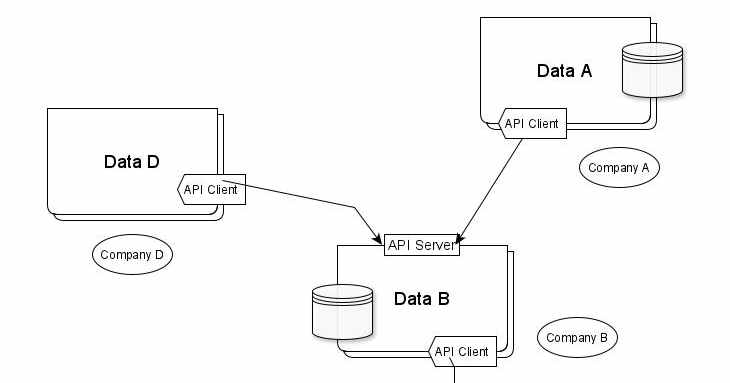
By the end of this guide you’ll have a working Spring Boot RESTful API, built with Gradle and documented with OpenAPI, and a live Swagger UI page you can show your team or put in your portfolio. We’ll build a real Finance API step by step, not a to-do list.
This series:
- Design the API with OpenAPI 3
- Generate a Spring Boot server with Swagger Codegen
- Implement it with Spring Boot, Gradle and OpenAPI (this post)
What You’ll Build
You will build a service that will implement a Finance API specified in API Hub Powered by Swagger.
Starting with Spring Initializr
To manually initialize the project:
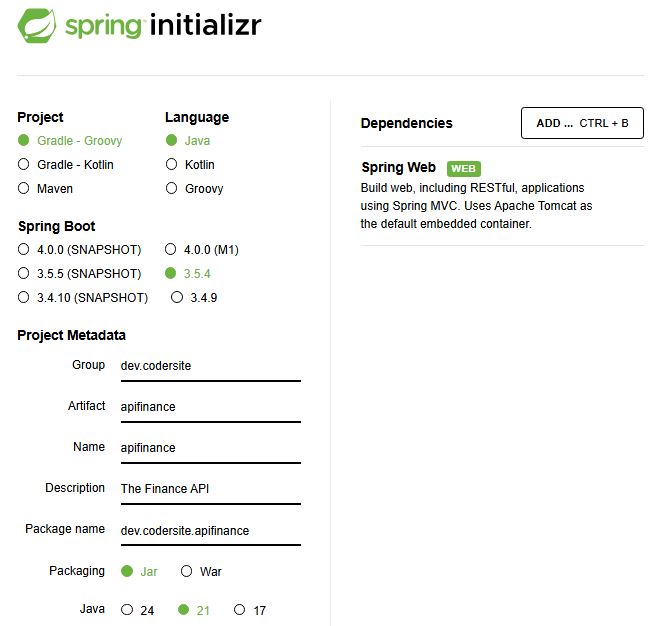
- Navigate to https://start.spring.io and setup the following configuration:
-
Click GENERATE.
-
Download the resulting ZIP file, which is an archive of a web application that is configured with the choices above.
-
Open the project in your favourite IDE.
Gradle
Gradle automates the building, testing, and deployment of software from information in build scripts.
Gradle rewards people who understand it and punishes people who copy-paste build files. If you want to know what’s happening under the hood, this is the shortest path:

To download all dependencies to your local machine, run the following Gradle command in your IDE terminal:
1
C:\..\apifinance> .\gradlew build
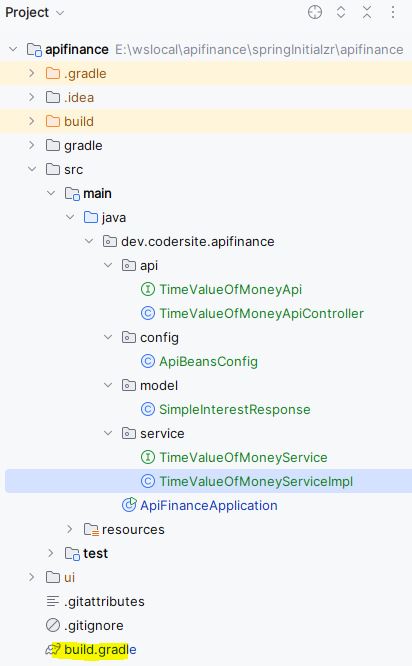
Next, create the following packages and classes:
To integrate Spring Boot with Swagger UI, add the following library to your project dependencies:
1
2
3
4
5
6
dependencies {
  .
  .
  .
  implementation 'org.springdoc:springdoc-openapi-starter-webmvc-ui:2.8.11'
}
Then run .\gradlew clean build to download the new dependency.
Next, we define an interface that declares the API’s operations using Swagger annotations.
1
2
3
4
5
6
7
8
9
10
@Tags(value = {@Tag(name = "timeValueOfMoney")})
@RequestMapping("/v1/timeValueOfMoney")
public interface TimeValueOfMoneyApi {

  @RequestMapping(value = "/simpleInterest",
    produces = {"application/json"},
    method = RequestMethod.GET)
  ResponseEntity<SimpleInterestResponse> getSimpleInterest() throws Exception;

}
Now we refactor the getSimpleInterest method so every request parameter is declared and documented with Swagger annotations.
Here is the code for the principal parameter:
1
2
3
4
5
6
7
8
9
10
11
12
13
14
15
16
  @Operation(
    summary = "Gets the calculated simple interest",
    description = "Gets the calculated simple interest for the requested parameters",
    tags={ "timeValueOfMoney" })
  @ApiResponses(value = {
    @ApiResponse(responseCode = "200", description = "OK", content = @Content(mediaType = "application/json",
      schema = @Schema(implementation = SimpleInterestResponse.class)))
  })
  @RequestMapping(value = "/simpleInterest",
    produces = {"application/json"},
    method = RequestMethod.GET)
  ResponseEntity<SimpleInterestResponse> getSimpleInterest(
    @Parameter(in = ParameterIn.QUERY, description = "is the principal amount", schema = @Schema())
    @Valid @RequestParam(value = "principal", required = true)
    Integer principal
  ) throws Exception;
Annotations like these are only half the story. Designing an API that other teams actually enjoy using is its own skill, and this is the book that teaches it:
Run ApiFinanceApplication. By default, Spring Boot starts an embedded Apache Tomcat server. Open the API documentation at http://localhost:8080/swagger-ui/index.html.
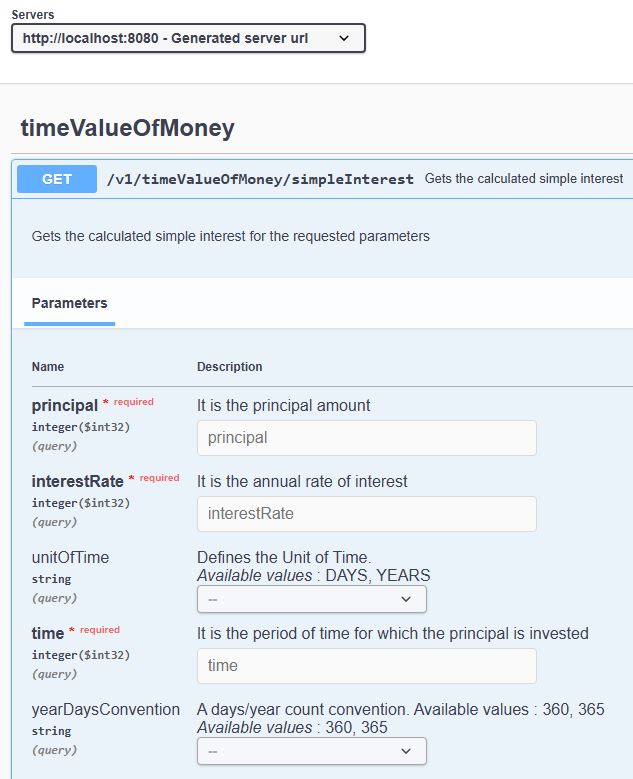
Next, we create a @RestController that receives the request parameters and delegates the actual calculation to a dedicated TimeValueOfMoneyService class.
1
2
3
4
5
6
7
8
9
10
11
12
13
14
15
16
17
18
19
20
21
22
23
24
25
26
27
28
@RestController
public class TimeValueOfMoneyApiController implements TimeValueOfMoneyApi {

  private final TimeValueOfMoneyService timeValueOfMoneyService;

  public TimeValueOfMoneyApiController(
    TimeValueOfMoneyService timeValueOfMoneyService) {
    this.timeValueOfMoneyService = timeValueOfMoneyService;
  }

  @Override
  public ResponseEntity<SimpleInterestResponse> getSimpleInterest(
    Integer principal,
    Integer interestRate,
    String unitOfTime,
    Integer time,
    String yearDaysConvention) throws Exception {

    SimpleInterestResponse response  = timeValueOfMoneyService.getSimpleInterest(
      principal,
      interestRate,
      unitOfTime,
      time,
      yearDaysConvention);

    return new ResponseEntity<SimpleInterestResponse> (response, HttpStatus.OK);
  }
}
Finally, we create a class that implements the service.
1
2
3
4
5
6
7
8
9
10
11
12
13
14
15
16
public class TimeValueOfMoneyServiceImpl implements TimeValueOfMoneyService {
  @Override
  public SimpleInterestResponse getSimpleInterest(
    Integer principal,
    Integer interestRate,
    String unitOfTime,
    Integer time,
    String yearDaysConvention) throws Exception {

    SimpleInterestResponse response = new SimpleInterestResponse();

    // Implement here ...

    return response;
  }
}
This is where the fun starts: implementing the formula itself, driven by unit tests. Fork the project from GitHub and try it yourself.
New to data structures and algorithms? Start with my guides on Data Structures and Algorithms.
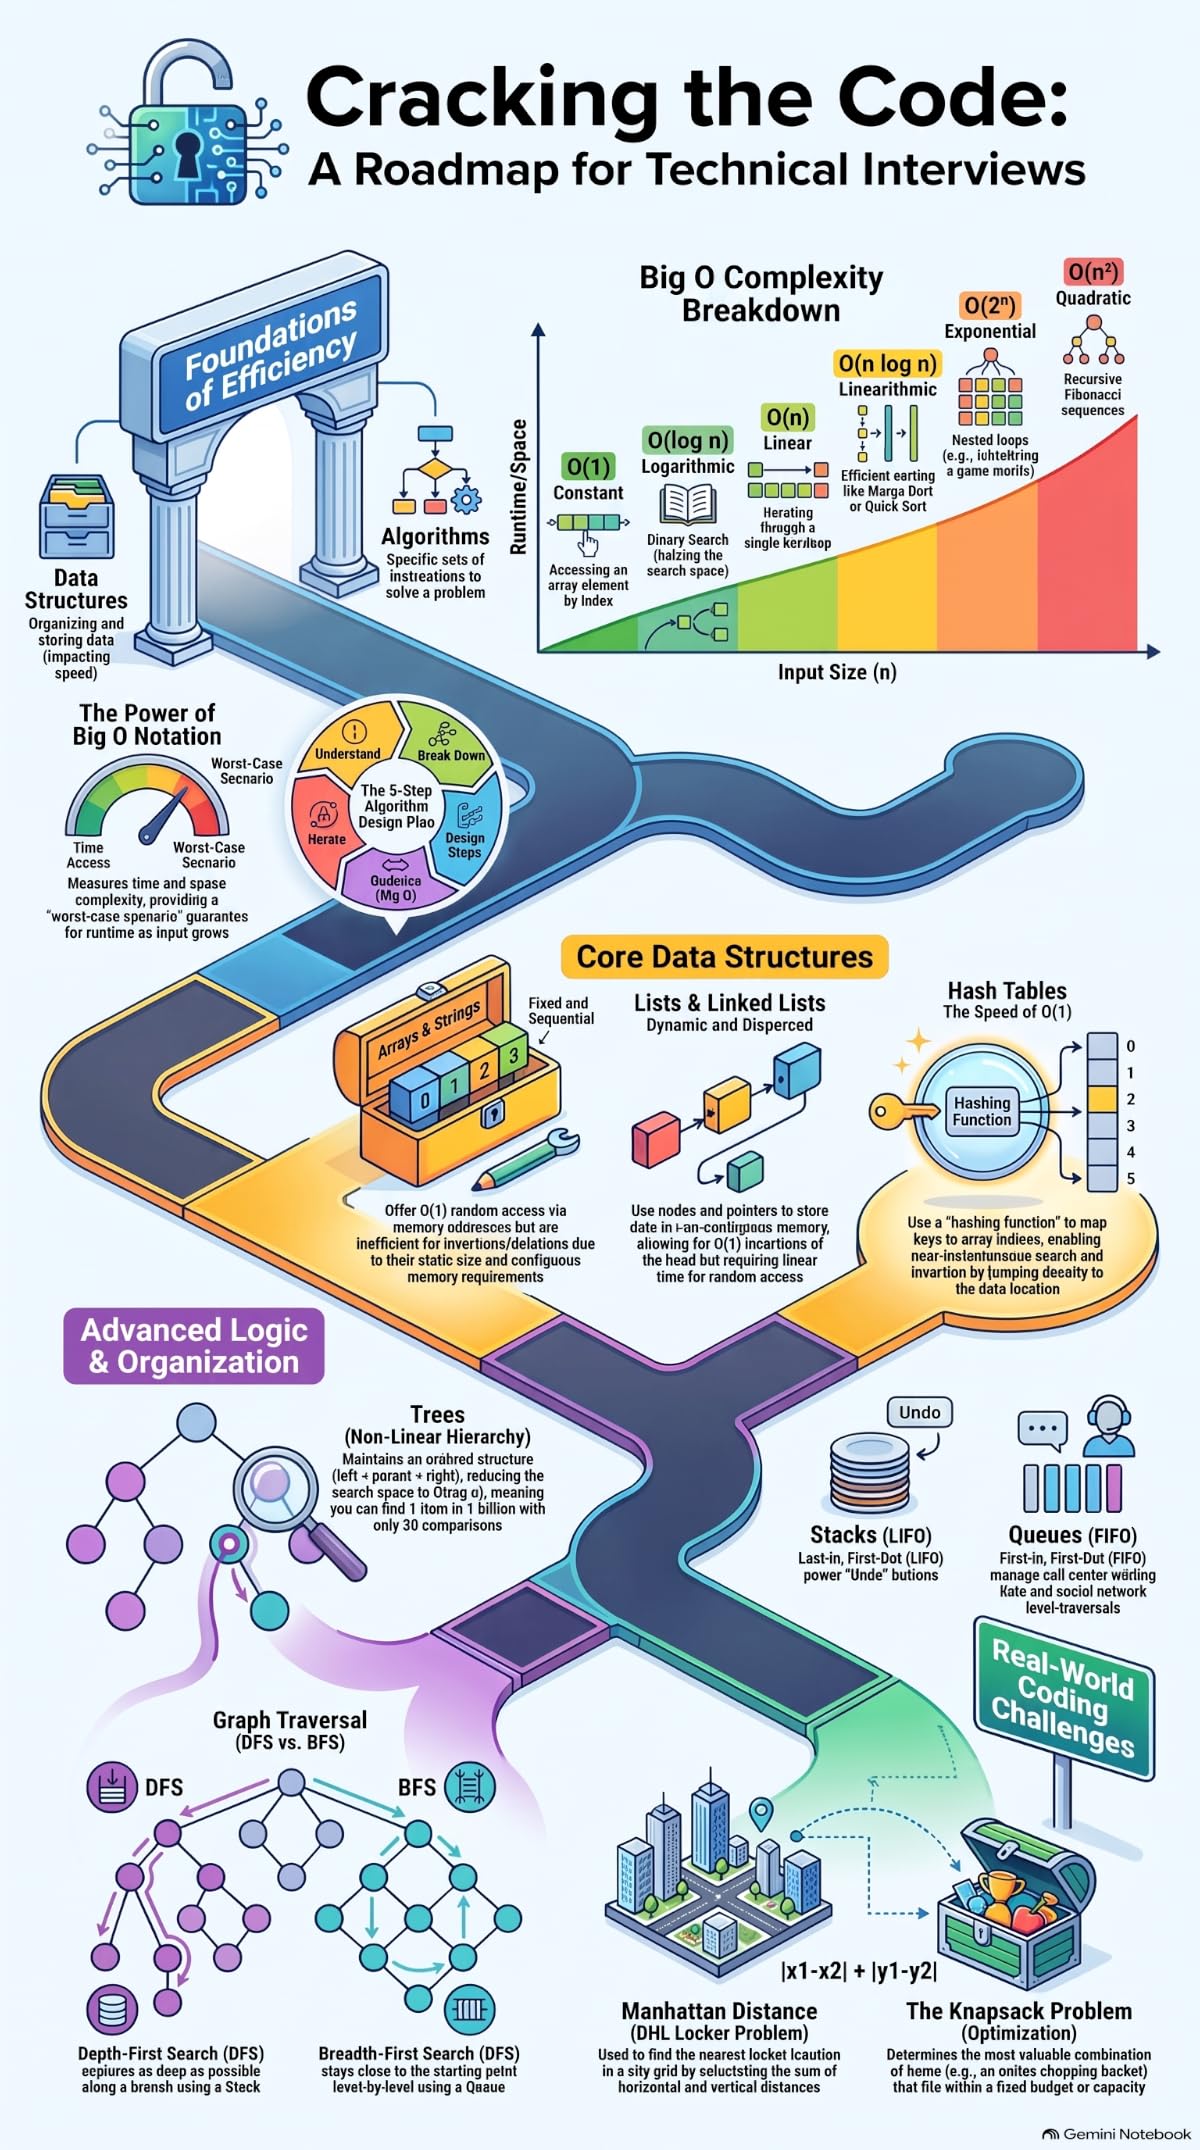
You just built a production-style API. That’s exactly the kind of thing interviewers ask you to design on a whiteboard. If you have interviews coming up, this roadmap tells you what to study and in what order:
“If this article helped you, help me create the next one.”
☕ Buy me a coffee