
Implementing hot-warm architecture in Elasticsearch for time-series data
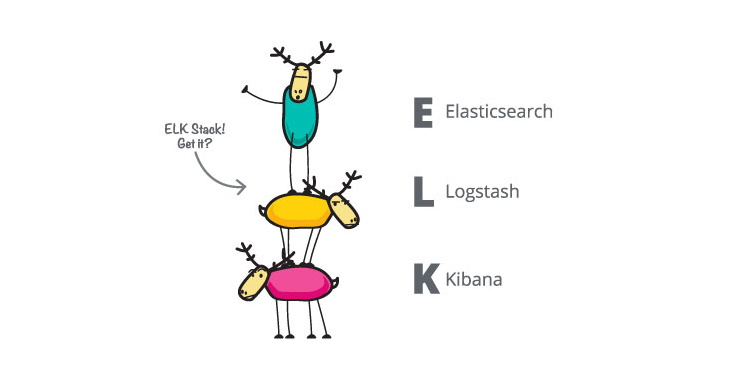
Elasticsearch is a distributed real-time document store where every field is indexed and searchable. It provides near real-time search and analysis for all types of data.
Elasticsearch is document oriented, meaning that it stores entire objects or documents.
Fundamentals concepts
The act of storing data in Elasticsearch is called indexing.
An index is a collection of documents and each document is a collection of fields, which are the key-value pairs that contain your data. Every index has some properties like mappings, settings, and aliases.
In Elasticsearch, a document belongs to a type, and those types live inside an index. We can draw a parallel to a traditional relational database:
Relational DB ⇒ Databases ⇒ Tables ⇒ Rows ⇒ Columns
Elasticsearch ⇒ Indices ⇒ Types ⇒ Documents ⇒ Fields
In Elasticsearch, the term document has a specific meaning. It refers to the top-level, or root object that is serialized into JSON and stored in Elasticsearch under a unique ID.
Elasticsearch lets you insert documents without a predefined schema (in RDBMS you need to define tables in advance).
Inverted index
Relational databases add an index, such as a B-tree index, to specific columns in order to improve the speed of data retrieval. Elasticsearch use a structure called an inverted index for exactly the same purpose.
By default, every field in a document is indexed (has an inverted index) and thus is searchable – FullText search. A field without an inverted index is not searchable.
An inverted index consists of a list of all the unique words that appear in any document, and for each word, a list of the documents in which it appears
For example, your billing and ordering applications print the following message to the log file of their respective application servers.
1
[11.01.21 06:12:20:099 MESZ] J2CA0045E: Connection not available while invoking method queueRequest for resource jdbc/xxxxxx
Also, you have an image service that suddenly throws and prints to another application server the following error:
1
[28.01.21 17:47:48:647 MESZ] java.lang.Exception: I/O Exception: https://server/imageService
Once these documents are indexed into Elasticsearch, the following figure shows an inverted index data structure.

Clean Code: A Handbook of Agile Software Craftsmanship (Robert C. Martin) https://t.co/ARf0FUDzRw via @amazon
— Moises Gamio (@MoisesGamio) September 25, 2024
Mapping
In order to be able to treat date fields as dates, numeric fields as numbers, and string fields as full-text or exact-value strings, Elasticsearch needs to know what type of data each field contains. This information is contained in the mapping.
Index Templates
When you create an index template, you tell Elasticsearch which settings and mappings an index should have when it is created.
Shards
Shards are the physical instances of Apache Lucene, shards take care of the physical storage and retrieval of our data.
Nodes and Cluster
A node is a running instance of Elasticsearch, while a cluster consists of one or more nodes with the same cluster.name that are working together to share their data and workload.
Hot-warm architecture
Hot-warm architecture is a way to separate an Elasticsearch deployment into “hot” data nodes and “warm” data nodes.
In Hot nodes, You are actively querying and writing to your index.
In Warm nodes, You are still querying your index, but it is read-only.
In Cold nodes, You are querying your index less frequently. You can deploy it to less performant hardware.
We can balance indexing and query performance in Elasticsearch with a hot-warm architecture.
Learn how to design software that can handle millions of users without breaking a sweat.

JVM Logs
The JVM logs are created by redirecting the System.out and System.err streams of the JVM to independent log files. The System.out log is used to monitor the health of the running application server. The System.err log contains exception stack trace information for problem analysis.
Problem
When we need to identify bottlenecks, errors, heavy traffic issues, slow-running queries, connection pooling problems, and more, we usually analyze our application server logs. But this task is tedious because the log files are distributed in a cluster that contains several application servers with their applications. Depending on each application server product, rotating policies for regenerating a log file cause historical records to be lost - data retention period.

If every business area has different cluster, the licenses and number of application servers are exponential.
Solution : Hot-warm architecture for log analytics with Elasticsearch
To centralize, increase the availability of this log data, and improve error analysis, we implement Elasticsearch.
We are going to install a Hot-Warm-Cold Logging Cluster on the Elasticsearch Service as shown in the following figure.

Arrays, graphs, recursion, dynamic programming — all in one book, all in Java.

Logs come from multiple sources, such as software applications installed on various application servers.
Choosing the right hardware for hot-warm architecture in Elasticsearch
We have the following IP addresses (Three Windows Servers):
master   110.1.0.101
hotnode  110.1.0.102
coldnode 110.1.0.103
Open Windows Defender Firewall and add the following rule for the three machines:

For the hotnode add an extra 5044 port to the rule if you want to install logstash in that machine.
Configure Elasticsearch cluster settings at Master Node
Open …/elasticsearch.yml and copy the following content.
bootstrap.memory_lock: true
cluster.initial_master_nodes:
  - masternode.codersite.dev
cluster.name: elasticprod
http.port: 9200
network.host: 110.1.0.101
node.data: false
node.ingest: false
node.master: true
node.max_local_storage_nodes: 1
node.name: masternode.codersite.dev
path.data: E:\ProgramData\Elastic\Elasticsearch\data
path.logs: E:\ProgramData\Elastic\Elasticsearch\logs
transport.tcp.port: 9300
xpack.license.self_generated.type: basic
xpack.security.enabled: false
discovery.seed_hosts: ["110.1.0.102:9300", "110.1.0.103:9300"]
path.repo: E:\repo
Check the installation with the following command:
C:\...\codersite.dev>curl -XGET http://110.1.0.101:9200/_cat/health?v=true
epoch      timestamp cluster     status node.total node.data shards pri relo init unassign pending_tasks max_task_wait_time active_shards_percent
1611057767 12:02:47  elasticprod green           1         0      0   0    0    0        0             0                  -                100.0%
Configure Elasticsearch cluster settings at Hot Node
bootstrap.memory_lock: true
cluster.name: elasticprod
discovery.seed_hosts:
  - 110.1.0.101:9300
  - 110.1.0.103:9300
http.port: 9200
network.host: 110.1.0.102:9300
node.data: true
node.ingest: false
node.master: false
node.max_local_storage_nodes: 1
node.name: hotnode.codersite.dev
path.data: E:\ProgramData\Elastic\Elasticsearch\data
path.logs: E:\ProgramData\Elastic\Elasticsearch\logs
transport.tcp.port: 9300
xpack.license.self_generated.type: basic
xpack.security.enabled: false
cluster.initial_master_nodes: masternode.codersite.dev
path.repo: E:\repo
node.attr.box_type: hot
Check the installation with the following command:
C:\...\codersite.dev>curl -XGET http://110.1.0.101:9200/_cat/nodes
110.1.0.101 4 66 0    lmr      * masternode.codersite.dev
110.1.0.102 1 60 8    cdhlrstw - hotnode.codersite.dev
Elasticsearch: The Definitive Guide: A Distributed Real-Time Search and Analytics Engine https://t.co/jMzY0hKid8 via @amazon
— Moises Gamio (@MoisesGamio) September 25, 2024
Configure Elasticsearch cluster settings at Cold Node
bootstrap.memory_lock: true
cluster.name: elasticprod
discovery.seed_hosts:
  - 110.1.0.101:9300
  - 110.1.0.102:9300
http.port: 9200
network.host: 110.1.0.103
node.data: true
node.ingest: false
node.master: false
node.max_local_storage_nodes: 1
node.name: coldnode.codersite.dev
path.data: E:\ProgramData\Elastic\Elasticsearch\data
path.logs: E:\ProgramData\Elastic\Elasticsearch\logs
transport.tcp.port: 9300
xpack.license.self_generated.type: basic
xpack.security.enabled: false
cluster.initial_master_nodes: masternode.codersite.dev
path.repo: E:\repo
node.attr.box_type: cold
Check the installation with the following command:
C:\...\codersite.dev>curl -XGET http://110.1.0.101:9200/_cat/nodes
110.1.0.101 5 66  0    lmr      * masternode.codersite.dev
110.1.0.102 1 60  0    cdhlrstw - hotnode.codersite.dev
110.1.0.103 2 66 25    cdhlrstw - coldnode.codersite.dev
Please donate to maintain and improve this website if you find this content valuable.
Before we define Index Templates and configure our Index Lifecycle Policies, we must install the Kibana product.
Installation and configuration of Kibana
Kibana enables to us navigate through our data (log files)
We have installed kibana using a zip package.
Check that the following lines are included and activated in the kibana.yml file.
C:\<kibana-folder>\config\kibana.yml fileserver.port: 9340
server.host: "110.1.0.104"
elasticsearch.hosts: "110.1.0.101:9200"To run kibana, execute the following command:
C:\<kibana-folder>\bin>kibana.batFrom our local workstations we can access kibana in our browsers using the following url:
http://110.1.0.104:9340/Creating index templates
We must create and configure our index templates prior to index creation.
From Stack Management -> Index Management -> Index Templates, we create a new index template for our billing application log files.

The following snippet code is the final template for new indices whose names match the billing* index pattern. Every time Elasticsearch receive a log file, it transforms it into an index by applying the following settings:
{
  "template": {
    "settings": {
      "index": {
        "lifecycle": {
          "name": "billing_policy"
        },
        "number_of_replicas": "0",
        "routing": {
          "allocation": {
            "require": {
              "box_type": "hot"
            }
          }
        }
      }
    },
    "mappings": {
      "properties": {
        "was_date": {
          "type": "date",
          "format": "dd.MM.yy HH:mm:ss:SSS"
        }
      }
    },
    "aliases": {}
  }
}
The routing attribute lets you see which data tier the new indices are allocated to. In our Hot-warm architecture, this will be the Hot Node (box_type attribute).
The snippet code also defines a lifecycle to automate when and how to transition an index through our nodes.
Data lifecycle management in Elasticsearch
ILM: Manage the index lifecycle
We can create and apply Index Lifecycle Management (ILM) policies to automatically manage our indices following our retention requirements.
We create a billing policy that defines how to move your data through the following phases.

We want to move our data index to the Cold Node after 30 days from the index’s rollover.

If we want to configure a Delete phase, we must enable the “Delete data after this phase” label.
In this Cold phase, we also need to select the node attribute we defined for the Cold Node.

Finally, to save space on our machines, we define a Delete phase to delete our data index after 60 days from the index’s rollover.

Now our index templates and lifecycle policies are ready. Let’s now move on to the sources where the log files come from to Elasticsearch.
Dependency is the key problem in software development. – Software Design, The Art of managing dependencies and Abstractions.
Using Logstash to Extract, Transform, and Load Data
Logstash allow us to collect data (log files) from different sources (application servers), and can be enriched, transformed, filtered and moved to elasticsearch.
We have installed logstash using a zip package.
Logstash will be the receiver for log data from sources such as Beats Agents installed on the Java application servers.
We need to create a pipeline (config file) in which we define an input (collect data), a filter (data transformation), and an output (load data into elastic).

Before we create the Logstash pipeline, we’ll configure a Beat Agent called Filebeat to send log lines to Logstash.
Configuring Filebeat to Send Log Lines to Logstash
Filebeat is a lightweight shipper for forwarding and centralizing log data. Installed as an agent (service) on our Java application servers, Filebeat monitors the log files, collects log events, and forwards them to Logstash for indexing.
We have installed Filebeat with Windows MSI Installer, establishing it as a Windows service.
Open the filebeat.yml file in your Filebeat installation directory and replace the content with the following lines. Make sure the paths point to the application server log files.
filebeat.inputs:
- type: log
  paths:
    - /path/to/logs/billingServer/SystemOut.log
output.logstash:
  hosts: ["110.1.0.102:5044"]
  ilm.enabled: true
The log files that Filebeat processes are redirected - output - to the machine where we will install Logstash.
On Windows machines, the absolute path to the log files looks like the following line:
  paths:
    - "C:\\path\\to\\logs\\billingServer\\SystemOut.log"
At the application servers machines (data source), run Filebeat with the following command.
sudo ./filebeat -e -c filebeat.yml -d "publish"Filebeat will attempt to connect Logstash on port 5044.
Configuring Logstash for Filebeat Input
Next, we create a primary Logstash configuration pipeline that uses the Beats input plugin to receive events from the application servers and an output section to write to Elasticsearch.
input {
  beats {
    port => 5044
  }
}
# The filter part of this file is commented out to indicate that it is optional.
# filter {
#
# }
output {
  stdout { codec => rubydebug }
  elasticsearch {
    hosts => [ "110.1.0.101:9200" ]
    index => "billing-%{[@metadata][version]}"
    ilm_policy => "billing_policy"
    action => "create"
  }
}
Tu run logstash, execute the following command.
C:\<logstash-folder>\bin>logstash -f ..\config\billing-pipeline.conf --config.reload.automaticWith this minimal configuration, you can visualize your log files in Kibana.
Please donate if you find this content valuable.
Customizing the filter
To use logs data from Elastic to set up a rate-limit algorithm, we need to parse it using filter plugins.
We want to know how many requests for every endpoint and client arrive at our application servers by month, day, hour, minute, and second.
Grok filter
Grok combines text patterns into something that matches your logs.
Grok pattern: %{SYNTAX:SEMANTIC}
The SYNTAX is the name of the pattern that will match your text.
The SEMANTIC is the identifier you give to the matched piece of text.
For example, we can pull out fields from a server log file.
55.3.244.1 [19.08.22 05:13:42 +0000] codersite.dev GET /v1/api/billings 15824 0.043The filter section inside logstash pipeline looks like the following.
filter {
  grok {
    match => { "message" => "%{IP:client} %{DATA:timestamp} %{WORD:client} %{WORD:method} %{URIPATHPARAM:endpoint} %{NUMBER:bytes} %{NUMBER:duration}" }
  }

  grok {
    match => ["timestamp", "%{WORD:was_dd}.%{WORD:was_MM}.%{WORD:was_yy} %{SPACE}%{WORD:was_HH}:%{WORD:was_mm}:%{WORD:was_ss}"]
  }
}
We build an aggregation that summarizes our data. The following search runs a terms aggregation on “codersite.dev” client.
GET .ds-billing-index-000006/_search
{
  "size": 0,
  "query": {
    "match": {
      "client.keyword": "codersite.dev"
    }
  },
  "aggs": {
    "all_clients": {
      "terms": {
        "field": "client.keyword"
      },
      "aggs": {
        "all_endpoints": {
          "terms": {
            "field": "endpoint.keyword"
          },
          "aggs": {
            "all_was_years": {
              "terms": {
                "field": "was_yy.keyword"
              },
              "aggs": {
                "all_was_months": {
                  "terms": {
                    "field": "was_MM.keyword"
                  },
                  "aggs": {
                    "all_was_days": {
                      "terms": {
                        "field": "was_dd.keyword"
                      },
                      "aggs": {
                        "all_was_hours": {
                          "terms": {
                            "field": "was_HH.keyword"
                          },
                          "aggs": {
                            "all_was_minutes": {
                              "terms": {
                                "field": "was_mm.keyword"
                              }
                            }
                          }
                        }
                      }
                    }
                  }
                }
              }
            }
          }
        }
      }
    }
  }
}
The book is based on real questions that companies ask in their interviews. It is not a collection of generic questions that you can find in many books. It is based on real questions that companies ask in their interviews.
Aggregation results are in the response’s aggregations object.
{
  "took" : 1253,
  "timed_out" : false,
  "_shards" : {
    "total" : 1,
    "successful" : 1,
    "skipped" : 0,
    "failed" : 0
  },
  "hits" : {
    "total" : {
      "value" : 10000,
      "relation" : "gte"
    },
    "max_score" : null,
    "hits" : [ ]
  },
  "aggregations" : {
    "all_clients" : {
      "doc_count_error_upper_bound" : 0,
      "sum_other_doc_count" : 0,
      "buckets" : [
        {
          "key" : "codersite.dev",
          "doc_count" : 2310409,
          "all_endpoints" : {
            "doc_count_error_upper_bound" : 0,
            "sum_other_doc_count" : 0,
            "buckets" : [
              {
                "key" : "/v1/api/billings",
                "doc_count" : 2309966,
                "all_was_years" : {
                  "doc_count_error_upper_bound" : 0,
                  "sum_other_doc_count" : 0,
                  "buckets" : [
                    {
                      "key" : "23",
                      "doc_count" : 2309966,
                      "all_was_months" : {
                        "doc_count_error_upper_bound" : 0,
                        "sum_other_doc_count" : 0,
                        "buckets" : [
                          {
                            "key" : "09",
                            "doc_count" : 1516918,
                            "all_was_days" : {
                              "doc_count_error_upper_bound" : 0,
                              "sum_other_doc_count" : 712935,
                              "buckets" : [
                                {
                                  "key" : "13",
                                  "doc_count" : 80457,
                                  "all_was_hours" : {
                                    "doc_count_error_upper_bound" : 0,
                                    "sum_other_doc_count" : 0,
                                    "buckets" : [
                                      {
                                        "key" : "06",
                                        "doc_count" : 10061,
                                        "all_was_minutes" : {
                                          "doc_count_error_upper_bound" : 0,
                                          "sum_other_doc_count" : 1146,
                                          "buckets" : [
                                            {
                                              "key" : "17",
                                              "doc_count" : 939
                                            },
                                            {
                                              "key" : "18",
                                              "doc_count" : 916
                                            },
                                            {
                                              "key" : "26",
                                              "doc_count" : 840
                                            }
                                          ]
                                        }
                                      },
                                      {
                                        "key" : "21",
                                        "doc_count" : 10061,
                                        "all_was_minutes" : {
                                          "doc_count_error_upper_bound" : 0,
                                          "sum_other_doc_count" : 1461,
                                          "buckets" : [
                                            {
                                              "key" : "18",
                                              "doc_count" : 889
                                            },
                                            {
                                              "key" : "19",
                                              "doc_count" : 882
                                            }
										  ]
                                        }
                                      }
                                    ]
                                  }
                                }
                              ]
                            }
                          }
                        ]
                      }
                    }
                  ]
                }
              }
            ]
          }
        }
      ]
    }
  }
}
From the buckets per minute, we can see codersite.dev client sends an average of 893 requests per minute.
Based on these accurate statistics and analyses, you know how to limit the number of requests allowed per client + endpoint. In this way, you can protect your software infrastructure from possible attacks or overuse of hardware resources.
Learn How to implement Rate Limiting algorithm.
Now that you have centralized all server logs in only one cluster, you can monitor or diagnose possible errors. Kibana will inform you about all application servers’ errors in one unified report.
Here is an example:

Please support me as a writer. Every contribution helps, and your donation can help add more articles to this website, no matter how small. Thank you!